Friday, March 4, 2011

As Promised, Cookie Dough Truffles!


"There are four basic food groups: milk chocolate, dark chocolate, white chocolate and chocolate truffles." - Author Unknown

These truffles have been begging to be made for about three weeks, since about Valentine's Day! If you remember I had 3 desserts planned for Valentine's Day, but since (right now) we are only two at home, it would have been way too much food. Once in awhile we get this adorable little raccoon named Phillippe that comes by for a snack and ends up polishing off any of our left over sweets, but most of the time we are just two!
So one by one I made the desserts, but staggered them out one week at a time. I started with Cake Pop 'Kisses' for Valentine's Day, then Nutella Sandwich Cookies the next week, and finishing this week with Cookie Dough Truffles!
I found this recipe fairly simple and it only took about 45 Minutes to make them (not including chilling time which is about 3 hours). That's not bad for a dessert that can be frozen and unthawed anytime you have guests over, it's actually a time saver! Ha! I still have to practice chocolate coating things in a double boiler, so far the 'two fork method' seems to be working... but there's got to be something simpler... Will get back to you on this!
I wish I could have shared them with all of you, because the cookie dough taste is immense! Even as a person who doesn't like chocolate, I liked these!

I'm not too sure what I'm going to bake next, maybe Cupcakes or Lemon Bars? I got this amazing German cookbook when I was there last, and it has some amazing recipes that I think you will soon see featured on this blog! But, If you have any ideas for things for me to try out and blog about, let me know! Either write me a comment below or as most of you do, on twitter @flightattdntjen !
Hope you enjoy the pics!

(Big THANX again to Jon for lending his camera <I swear I'll get it back to you soon! ;) > & to Dave for being my photographer once again, Because I am rubbish at taking photos!)

I didn't say this on my last blog, but I meant to... if you want the full effect of the image you can click on it to see it in full!
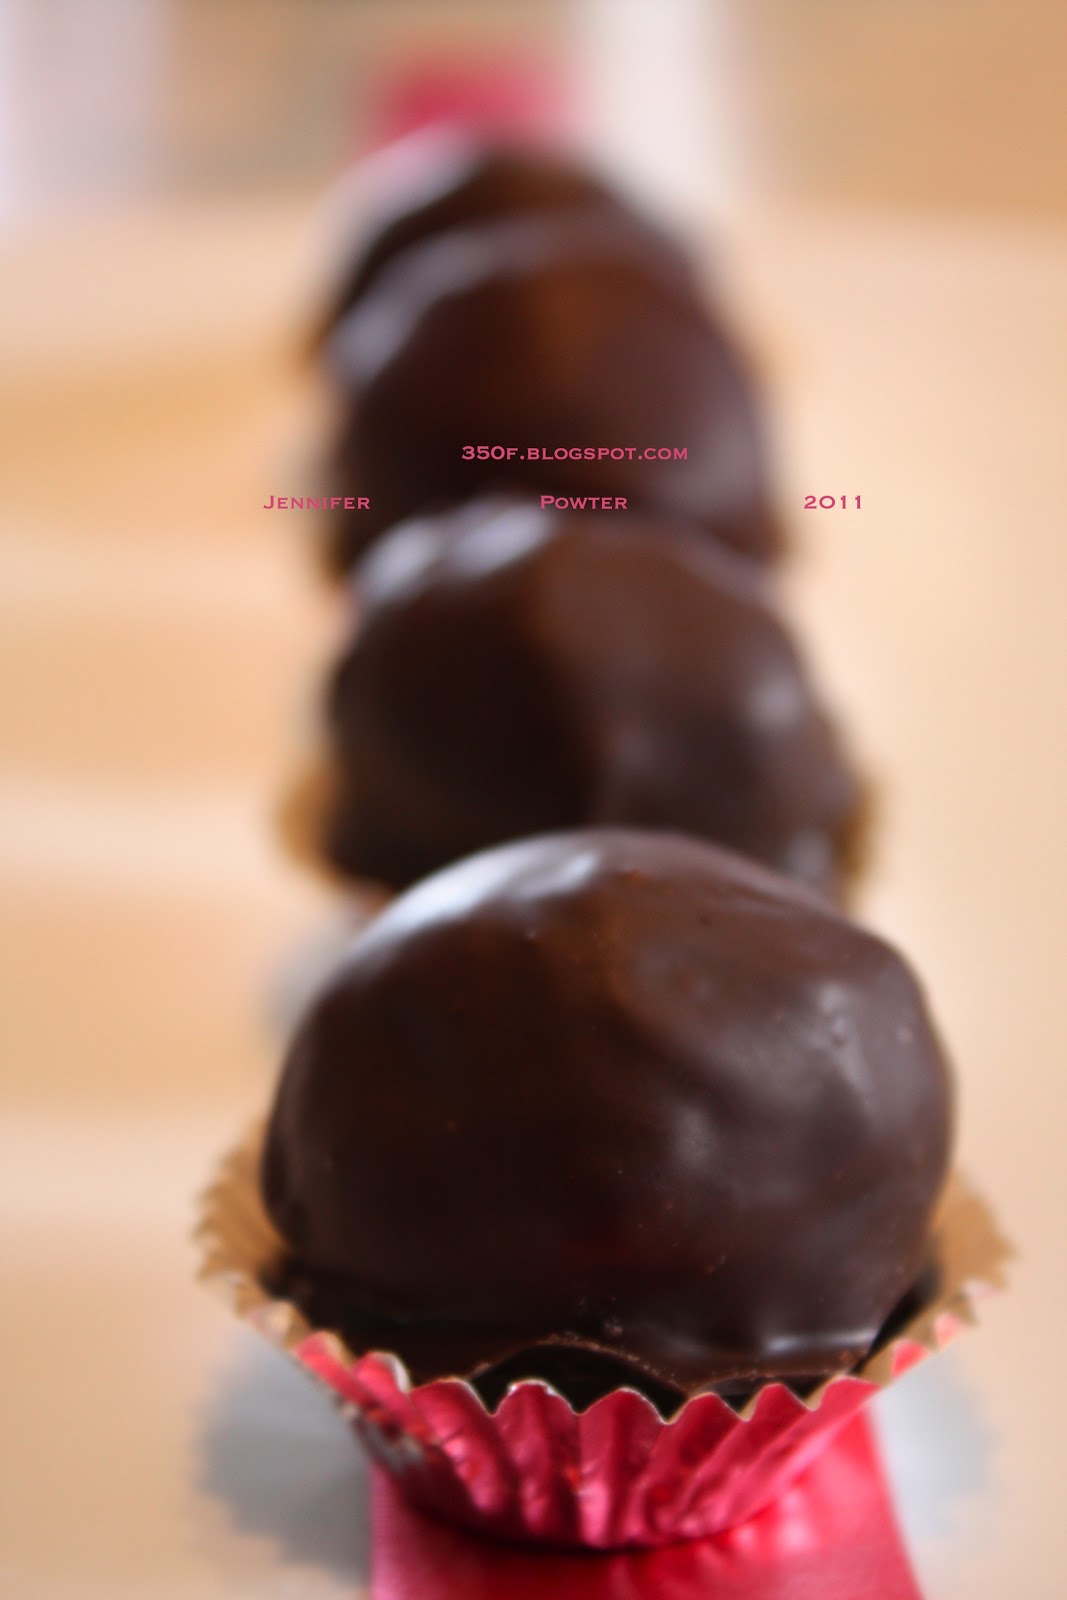

I hope you like sweets because these are sweet

Couldn't resist! They looked too yummy! Ha Ha!  Just kidding- It's staged!

The recipe says it yields 5 dozen. Not quite, but it was still a lot.

Cookie dough- Yum! Who can say 'no' to yummy cookie dough
I think this is my all time favorite picture!

Packaging! Goodbye treats! Glad your not all staying in my house!

Box that got sent to my BIL!
I get to borrow his camera... he gets paid in sweets!
Good trade, I think! ;)

Thursday, February 24, 2011

Happy 27th Birthday David!!! Fondant piano cake

“Birthdays are nature's way of telling us to eat more cake.” Anonymous


Last year for my husbands birthday I was starting to get into cake decorating, so I made him a checker board "Black & White" themed cake. The very next day, feeling inspired I was lost in a web of cake designing websites and came across the idea for a fondant piano cake. Because my husband is known for being a piano player I thought this idea was genius! So for a year it has been in the back of my mind to make this cake for him this year! I wasn't too sure how it would turn out considering I have never touched fondant in my life, but it didn't stop me from going out and buying everything I could possibly need to do this cake. Lots of money was spent, enough said! Ha! (Thank God most was reusable tools!) 
So, basically my introduction to using fondant was a baptism by fire, seeing as I had never taken a course. My mom (the pastry chef) gave me a couple of tips over the phone, which were mostly useless, because I wasn't smart enough to follow them correctly, humpf! My cake was baked, cut to shape, and crumb coated at least 4 hrs in advance- too bad the fondant part took me over 6hrs. Fondant is really tricky, and if you attempt to use it for the first time, especially if you are coloring it yourself, I would do a mock cake a few days in advance. 
Here is how my cake turned out:


My husband was thrilled, and honestly a little shocked too I think. Ha Ha! It was a bit of a surprise that it wasn't a store bought cake, or even a home-frosted-wobbly-lettered-looking-job! 
If coloring fondant yourself (which is a tricky job, when you can buy pre-colored fondant for around the same price at any cake store) give it time and let it breathe! This probably sounds a little silly, but just like buttercream icing, or painting a wall- icing/fondant takes time to go darker. Don't constantly keep adding coloring to get it darker, you can always add more but you can never go back lighter. Also don't forget to keep it well covered to keep it from going hard. 
Wish I would have had a better camera, these shots just don't seem to do the cake justice! ;)


Rolling out the fondant is also extremely tricky, hence the 6 + hrs it took my to get the fondant right. Too thick and it will tear once rolled out over the cake, and too thin and will tear as you try to lift it. These are the kinda of stupid problems I encountered when trying to make this cake. Also measuring is KEY. Measure the circumference of your fondant once rolled out, measure your cake and then measure it again. You can never over measure! When decorating with fondant, strips, dots, or stars- try to keep consistency by... yes! Measuring! ;)


Can't wait 'til the next time I make a fondant cake. Now that I've already had my 6hr self taught lesson, I think I'm ready to handle anything!!!! 


Sunday, February 20, 2011

Nutella Sandwich Cookies

I am addicted to Nutella, the chocolate hazelnut spread? I can't live without it. I need a daily dose of Nutella. ~ Michelle Trachtenberg

Finally, without further delay - here are my Nutella Sandwich Cookies!!!


I'm not gonna lie, these weren't  the easiest cookies to make. It took a lot of steps to achieve these, but they were worth it!! 
They took about 3 days (mainly because I have been extremely busy), first there was skinning the hazelnuts... because I couldn't find any already skinned, my Goodness was that a chore. Did you know that there are whole websites dedicated to showing you how to skin a hazelnut?! Then I didn't have a food processor, so I had to grind the flour, sugar, and salt with the hazelnuts in stages in my Magic Bullet. Then there's the fact that I hate cut out cookies! They are so time consuming! I think that the end look is fab though, they are really cute if I do say so myself! 
The recipe was supposed to yield 2 dozen 'sandwiches' but actually  only yielded about 19, which was fine for me because after rolling out and cutting 19 of these I was fed up! :P
They are SO yummy too, not just esthetically pleasing! Ha! 
The cookie is very 'Nutty' because of the ground up hazelnuts, and perfectly complimented by the smooth interior of the Nutella- the chocolate drizzle is just for looks and extra calories- Duh!


... And just in case you couldn't tell from previous blogs to this one... I got my brother-in-laws camera, finally! (My husband is the photographer, Thanks Dave!!)
Hopefully I will be able to borrow it in the future for other blog post since it is so amazing! Hint! Hint! Jon if your reading!!! 
Although they were originally intended for V Day, they were enjoyed by the two guys who were furiously gaming at my place today! :) At least being in the kitchen gave me something to do while my Tv was being hogged all day! 


I found this recipe for these cookies online, and I think when I make them again I will definitely look for skinned hazelnuts, and possibly borrow my mothers food processor!! 

Hope you enjoyed the pictures!!! (Thanks again Jon!)
Up Next: Cookie dough truffles!
(... but it may be awhile until that blog because my next three trips are back-to-back, so in about 10 days!)


Thursday, February 17, 2011

Happy V DAY!!!

Oh, if it be to choose and call thee mine, love, thou art every day my Valentine!  ~Thomas Hood

❤ ♡ ❤

If you follow me on twitter, you'll know that Valentine's Day was a day late for my sweetie and I! He was busy on the 14th so we just slid it over by one day. Not the end of the world... actually- it was way more convenient! The restaurant was less packed the next day (when normally you Always have to make a reservation ahead of time, forget a holiday), all V Day goodies were on sale!! AND I had an extra day to bake!
I didn't get as much accomplished in the kitchen as I hoped to. It's alright though, because seeing as I still have about 5 days off work... I planned to just stagger out my baking. (I don't know if this annoys anyone else- but when you are just 2 at home, lots of baking goes to waste! And there is ONLY so much you can give to neighbors and family before they start thinking that you may be trying to poison them!)

My Valentine's baking Menu was the following: 

❤Valentines cake pop 'Kisses' Very loosely based on something I saw by Bakerella.

❤Valentines Nutella sandwich cookies
& 
❤Valentines Cookie dough truffles

The only thing I have made so far is the cake pop 'Kisses'!

Next up: Nutella sandwich cookies!

I think I'm most afraid of the cookie dough truffles because the recipe makes 5 DOZEN, and I don't like halving recipes! 

My husband absolutely LOVED my Valentines cake pop 'Kisses' !!
... and so did his brother, Lol. I had brought some while visiting my Mother-in-law in the hospital and he ended up taking the whole box home! HA! 

I do have some pictures, but they are RUBBBBBISH! I vow to borrow my brother-in-laws camera for my next blog entry (which SHOULD be tomorrow) so that I have decent pictures. Even though the pics are terrible  I hope you get the idea! ;)


Mashing up my cake for my cake pops!
(If it's not messy, your not doing it right!!)

Little Chocolate drops that will become chocolate dipped 'Kisses"

Ta-Dahhhhhhhhh!


:)

"Be Mine!" From another angle


 I'm really surprised at how simple cake pops are to make. I guess that's why they are now becoming the new trend in baking, and people are leaving behind the ever popular 'Cupcake' frenzy and heading to the exciting world of Cake Pops!
As, I write this I can hear my husband sitting on the couch eating one of these. Ha! I can hear him biting through the chocolate shell into the moist cake inside! I'll be honest though, I still don't know if I understand or GET cake pops?! Yes, I know... as my best friend has tried to tell me over and over- there's nothing to get- But if you want cake... why don't you just have a piece of cake?? I guess that's just me though... and others would prefer to eat their cake on a lollipop stick or in different shapes! I can live with that, especially if people want to buy it from me! 
;)

Next blog: Nutella Sandwich Cookies!


S'MORE PLEASE!!!


"I had a dream last night, I was eating a ten pound marshmallow. I woke up this morning and the pillow was gone." ~ Tommy Cooper


I AM IN LOVVVVVVVVVVVEEEE !!!!!! 
... With S'more cookies!


So this recipe was loosely based on the AMAZING blog by Patisserie Natalie. (Now, if only I could borrow my brother-in-laws camera to get the kind of shots she does...)
However, I found some of her recipe a little complicated to follow, so I adapted  it a little. I found all the recipes I used to make these online. They were AMAZING!!
Never had a S'more? What IS a S'More you ask! Mmmm- let me enlighten you!
A traditional S'More is usually two graham crackers a broken off piece of a (brand name here) plain milk chocolate bar, and a marshmallow or two- roasted over a blazing fire!
YUMMM! ...Or so i've heard... because I'm not outdoorsy enough to have ever been to a bonfire! lol
So, these cookies are essentially the same thing, the cookie is a little softer & sweeter, the marshmallow is soooooooooo tender and fluffy. On a side note: I don't think i'll ever eat a store bought marshmallow again!! Once you've had a homemade marshmallow you don't go back! ... Ok, I want to say so much about coloring and flavors but i'll save it for another blog.
And, the melted chocolate on the side is so smooth it just finishes off the cookie perfectly.
If your looking for a really good Marshmallow recipe Martha's got a great one!
Just a tip on these cookies though, if you ARE going to make them- DON'T roll out the cookies too thin. The thinner the cookie, obviously, the crunchier and less tender it is!

My progress is pictures:

Cutting out my homemade marshmallows- you need LOTS of icing sugar!

All DONE! This is 1 batch of Marshmallows

... assembling 

Getting dipped! Starting to look quite yummy!

Packaging and parceling!!!

DONE!

The cookies I brought for my crew


These cookies did NOT stick around long. They disappeared on  board once I took them out, and the couple I left at home while I was on my trip were gone by the time I got back! I would 100% make these again- and soon! They were a hit!
I wish I could have shared them with you all ... And maybe soon I will! Here's some good news- I'm currently in the middle of setting up a business!! It's very exciting, so far I have a business card & a logo. I'm just wonder if I should get involved and start selling on Etsy or get my own website! There is even a possibility of going into business with one of my best friends! Ahhhh, decisions decisions! :)

Keep You all posted!

Monday, January 3, 2011

YUM-MY! Best Cupcakes I've EVER had!

Cupcakes are muffins with plastic surgery ~ Anonymous


A little while ago I tangled into a confusing web of cupcakes. I had stumbled upon the Oh Sugar! blog while trying to find ideas on the web for decorating a giant cupcake. The Oh Sugar! blog then lead me to Cakespy, (which I had visited before) but this time a recipe caught my eye, which then brought me to my now Favorite blog of all time. Pȃtisserie Natalie !!! I sometimes get lost in her blog for hours! Well, the recipe that caught my eye on Cakespy was by Natalie. It was a delicious sounding cupcake recipe. The base calls for a lemon pound cake and  the frosting is a blackberry buttercream & raspberry buttercreams! YUM! 
I knew I had to give it a try, and I'm so glad I did! They were DELISH!!


Unfortunately my 1M tip went M.I.A (and I was real mad!) so the frosting is not as pretty as it should be...  but you get the idea! 

Anyhow, I brought these over to a friends house for a dinner party and left with an empty platter. Most people who don't even like cupcakes liked them! I found they tasted Sooo fresh and summery! To make these delicious cupcakes you don't even need to make a trip to the grocery store, you'll probably have everything on hand at home. So, go over to cakespy and check out the recipe for Lemon Berry Cupcakes! 


This is not a very complicated recipe, yet this is not a recipe you can make with a couple of extra minutes. You need to have the time do it properly. ( Don't be like me, I tried to whip these up in half an hour before our friends dinner party! :( That didn't go over to well with my husband, because I ended up having about 50 tantrums trying to rush these guys- I chalk it up to jet lag more then anything!)

Until next time (which shouldn't be too long because I'm trying to constantly use my kitchen aid mixer) try these cupcakes and leave me some feedback!!!

xo


It was a MERRY Christmas!

"A merry Christmas to everybody! A happy New Year to all the world!"

~ Charles Dickens


Christmas was great this year. This year everyone got what they wanted. Big and small. However I think I was the most spoiled this Christmas, my whole family chipped in to satisfy all my baking needs. From necessities like quiche pans & galette pans & a wire cooling rack (yeah- can you believe I didn't have one!) to the very fancy and really nonessential Madeleine pans. The biggest shock came when I arrived after breakfast to my mom's house and opened a big present that turned out to be a KITCHEN AID MIXER!!! (... and not just the basic mixer but the professional series one!)
Take a look!

A big THANK YOU again goes to everyone in my family that helped pitch in for this gift! I absolutely love it. One of my very good friends told me when I got it how much it will change my life- Wow! Was she ever right!! I love this thing, I've only had it about 10 days but already can't see my live without it.
So, what was the first thing I made with my mixer? That friends would be some traditional french Madeleines. Mmm Mmm they came out so well, and so fragrant! 
If you want to try Madeleines here's a fairly simple (yet yummy) recipe for beginners.
Here is what mine looked like:


They were my 1st ever attempts at Madeleines and they were SOOOOO yummy!! If you want a little twist on the traditional Madeleines try these or these . 

Just a couple of tips: 

✿Do clarify the butter that you will use. If you don't know how, check this out!
✿Don't over fill pans! otherwise there is no point to the dainty little Madeleine pan, as they become big poofy cakes!
✿Don't over bake, you want them to have a gorgeous golden color!
✿Do eat warm! They melt in your mouth, and your tummy will thank you.


I hope you all had lovely holidays, and I hope the New Year includes lots of delicious treats!